
School is right around the corner, and that means a daily influx of worksheets, artwork, and forms, oh my! You could be drowning in papers within the first week.
This time of year produces a war within me. My decluttering side says throw it all into recycling. I start to sort through the papers, and another voice pipes up: my sentimental side. You can’t throw away this handprint art. Or this worksheet completed with above average penmanship. Or this crayon drawing that shows incredible depth perception.
Before I know it, I’ve saved more than I’ve tossed. So what’s a proud mama to do? I’m very glad you asked! 🙂
First and foremost, be proactive! Devise a system to stay on top of it all before the paper deluge begins. Don’t wait until you’re overwhelmed and waist-deep in worksheets.
There is a plethora of options for managing your child’s paper memorabilia. Take some time to consider what exactly you need and research accordingly.
For my own system, I had several requirements:
- It had to be simple. After the initial setup of my system, I didn’t want to do any more work. The method needed to be easy to maintain and make my life easier.
- It had to be space efficient. I planned to store the papers in each corresponding child’s closet for easy access. It had to fit easily onto a shelf.
- It had to be durable. I’m saving this memorabilia for my children when they’re grown, so I looked for a storage option that could survive many years.
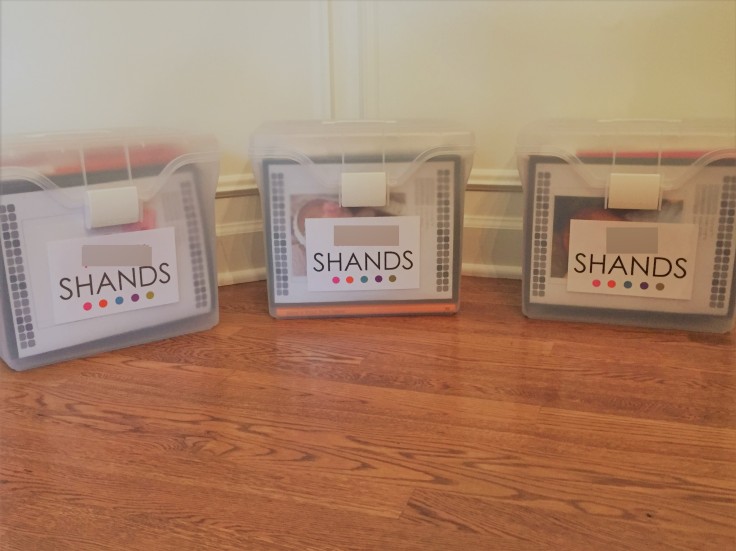
I found my inspiration at IHeart Organizing and adapted my own system. I even used Jen’s printables, which you can find at the above link as well. This is what I came up with (I’ve blurred out my kids’ first names for safety reasons):
Supplies
Hanging file box
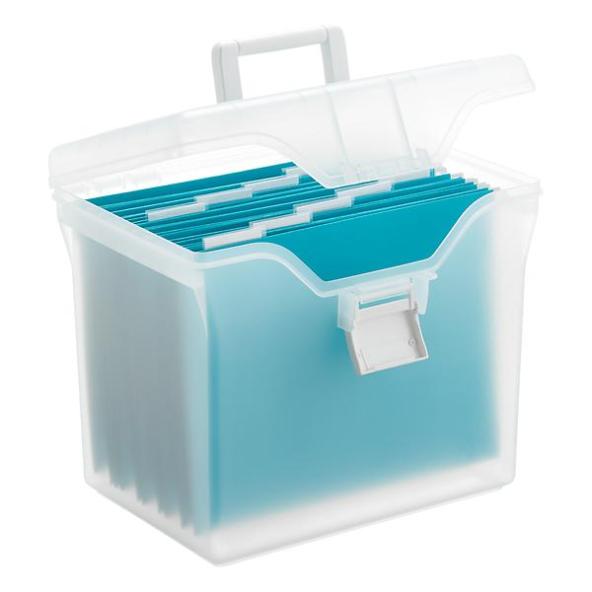
I bought mine at The Container Store for $15.99. There are plenty of other options for much less money, but I wanted something durable enough to survive until my children are grown. I’ve been very pleased with this portable box, but I would recommend purchasing something larger. I bought way too small. My oldest is going into first grade, and I can already see that we’re going to need more space. I’m all for paring down, but as it stands, I’ll only be able to save a handful of papers from each year. I suggest a “large file tote” instead.
Hanging file folders
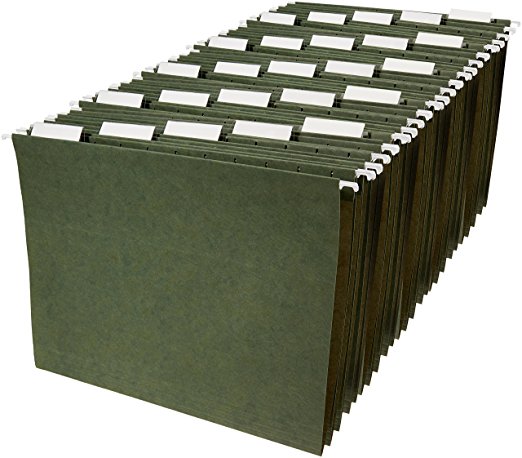
I used 17 file folders in each child’s box. My tabs include baby/toddler years, three years of preschool, and every grade until 12th.
Label maker or fine-tipped permanent marker

Optional: Paper coversheets for each folder (and a glue stick)

Here’s where you decide how crazy detailed you want to get. If you do want to take things a step further, create a coversheet for each folder front that features your child’s school photo, along with a few details about that year. My coversheets include blanks for the child’s name, current year, teacher, and school. As mentioned earlier, I printed my coversheets from IHeart Organizing, but you can design your own on the computer or simply use a piece of pretty scrapbook paper.
Tip: I went ahead and printed a coversheet for every year. That way, I’ll have a consistent look throughout, and everything is ready for me when I need it.
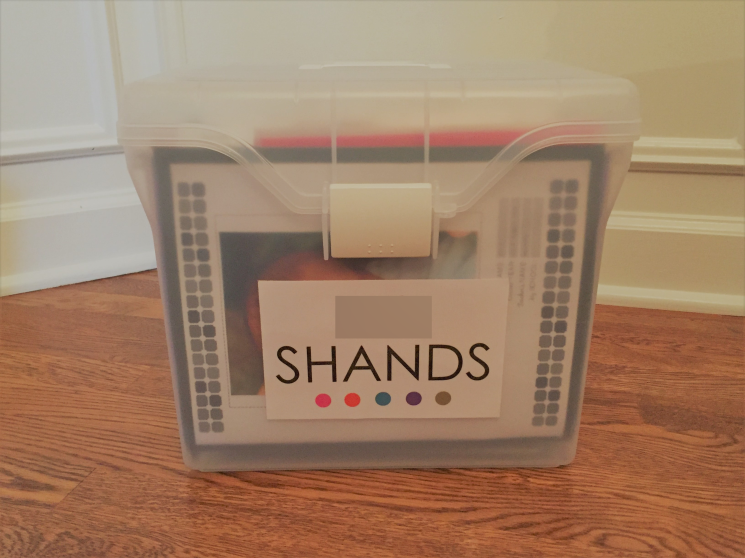
Optional: A decorative nameplate for the front of the bin
This is another instance where you can decide how far you want to take this. I created a cute nameplate for the front of each bin. My design featured each child’s name with some colored polka dots. Then, I laminated the papers with self-sealing laminating sheets and affixed them to the bins with a glue stick.
Once you’ve gathered your supplies, decide on your categories. Let’s use my son’s box as an example. I started with “Baby/Toddler,” then “Preschool 2015-2016,” “Preschool 2016-2017,” “Preschool 2017-2018,” “Kindergarten,” and so forth. I used my label maker to create each tab, but you can write directly onto the tabs or print them from the computer onto small shipping labels.

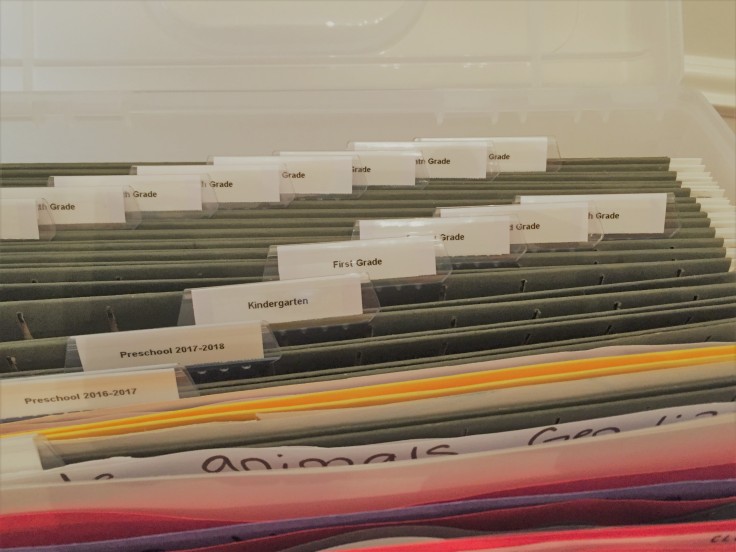
I positioned my tabs to flow from left to right, returning to the left only when I ran out of notches on the folder.
For those who opted to create coversheets: If you’re playing catch up, fill out the coversheets for past school years, and glue the completed sheets to the folders. As for the upcoming years, simply slide the coversheets into the corresponding folders for safekeeping.

So, let’s talk about what goes into these bins. The beauty of this system is limited space; it forces you to be choosy. And let’s be honest, would your child really want to haul multiple, huge containers of their schoolwork into their adult life? I think most kids would appreciate a collection that has been whittled down to a manageable number of keepsakes. That said, it’s totally up to you how selective you want to be. Just be sure to take into account your available storage.
I mostly save special artwork, worksheets that showcase their personalities, and awards.
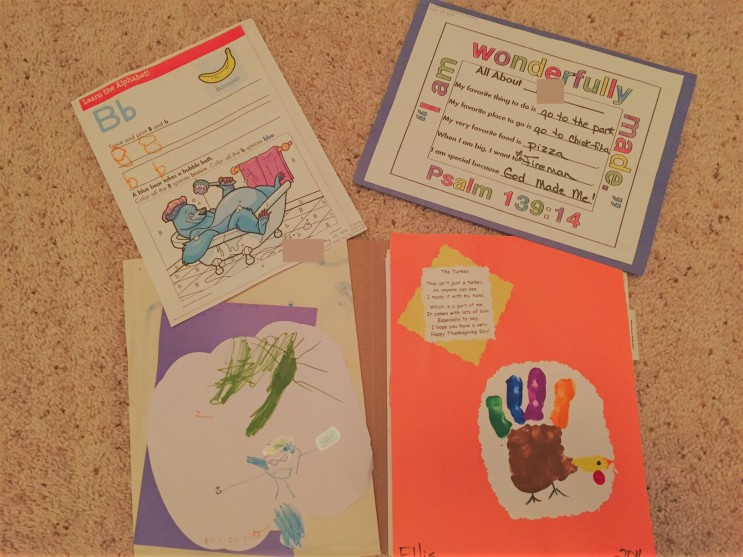
Since artwork tends to be a larger category, you might decide to keep it in a separate container or even take photos for a special album and toss the originals. As for me, I keep it all together. I have bulletin boards for each child’s creations that I change every so often. When I take down the old stuff, I choose what to add to their save bin.

Once the school year starts, try to make a routine of going through your child’s backpack right away…before there’s a chance to forget about it. Don’t give the paper clutter a chance to stack up. Take a few minutes to sign any permission slips, toss unneeded papers, add upcoming events to the calendar, make note of any homework, and set aside any artwork/papers that you want to save in your child’s bin.
Cheers to a more organized school year!


Love! My daughter is entering kindergarten next week and I wasn’t very good with her preschool stuff. This gives me a fresh start. Have a great day!
LikeLike
Hope it helps! Thanks for reading! My oldest is going into first, so I really relate to your kindergarten blog post. I went through a lot of that last year! The first week was tough for me, but it definitely got easier!
LikeLike